Manually Setup L2TP/IPSec connection in Windows 10
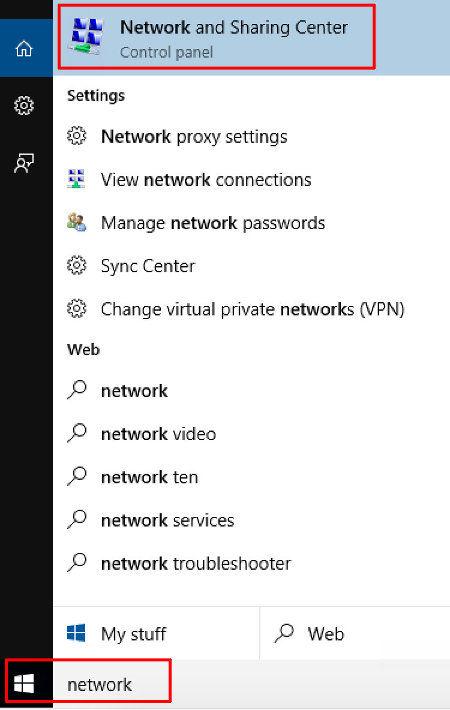
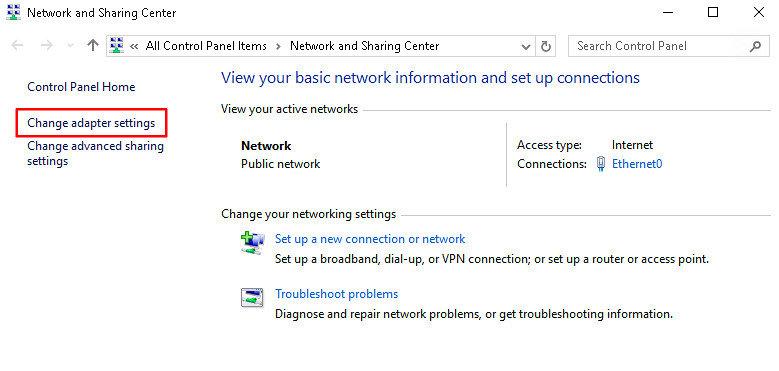
1. Go to your start menu, and type in "network". In the search results click on "Network and Sharing Center"
2. Select Connect to a workplace and click Next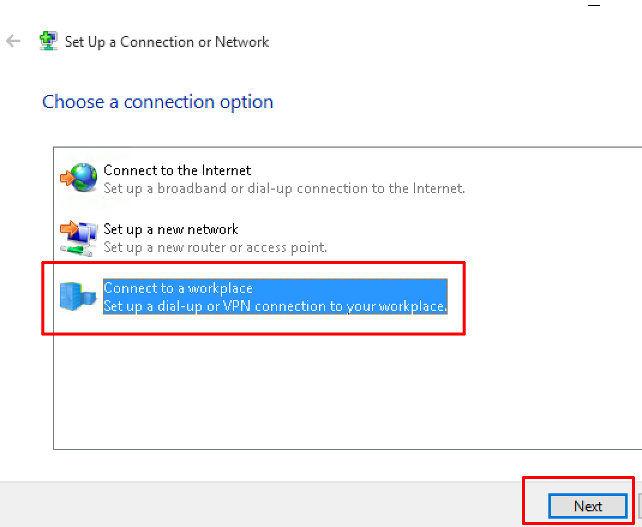
3. Click on Use My Internet Conection (VPN)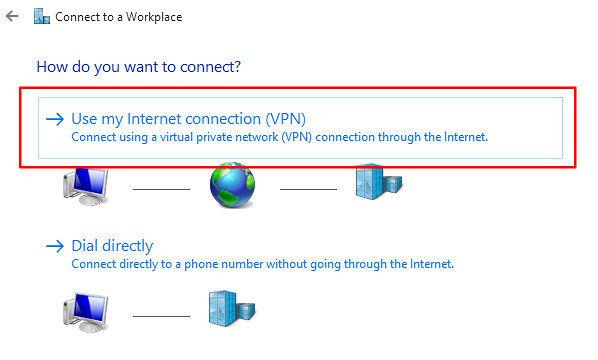
4. Enter in the internet address of the server you would like to connect too, Name (this can be anything) then Create. Our server list can be found HERE
5. Network and Sharing Center window should still be opened. Click on Change Adapter Settings
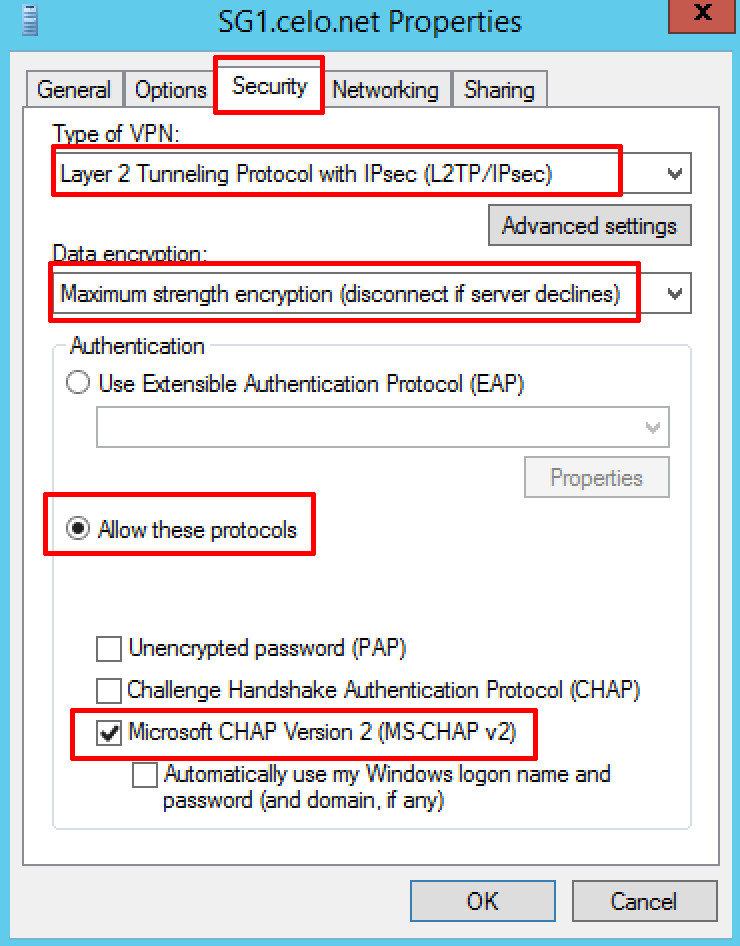
7. Go to the Security Tab, and change your properties to be the same as the below image
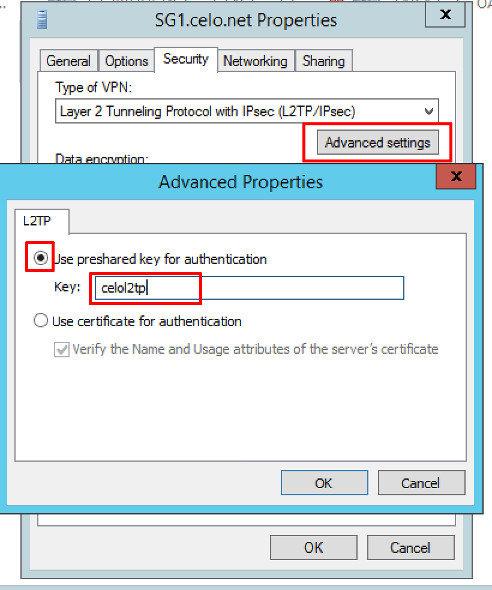
8. Once those settings have been changed click on Advanced Settings. Select the option "Use preshared key for authentication" and for the key field type in celol2tp. This preshared key must be set for the connection to work. Click on Ok twice.
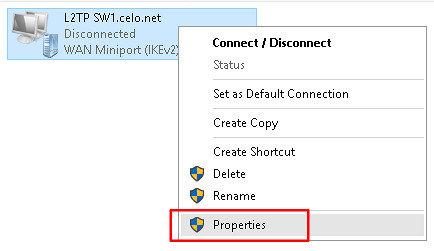
9. Double click on the VPN connection, Click on the connection name, then Connect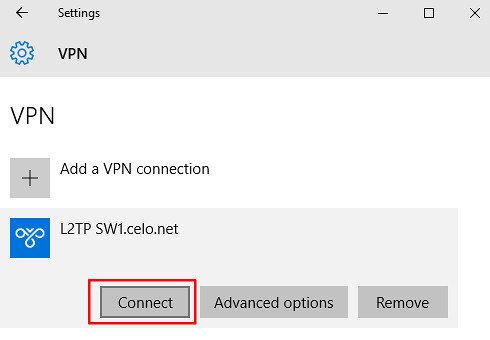
10. Enter in your vpn username (not your email) and password, then Ok. You computer will now be connecting to the server via the L2TP/IPSec protocol
11. To easily access your VPN connections in Windows 10, go to your notification center in the task bar and click on VPN button. This will bring up the list of VPN connections available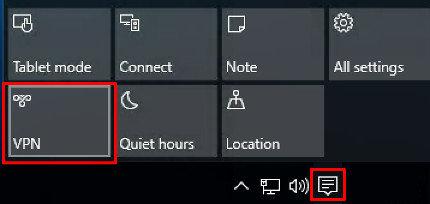
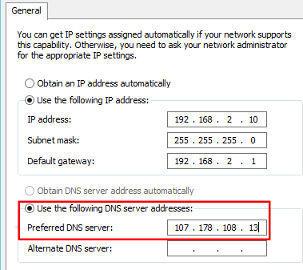
NOTE: If your computer has been setup with a static IP, we recommend to use one of our DNS Servers to stop DNS Leaks