** NOTE: The instructions below will only work on more recent versions of DD-WRT
Before you begin, make sure your router is properly configured for a NTP server and has the correct time
1. Download our OpenVPN Server Profiles from HERE and extract the .ZIP
2. Log into the router via your web browser
3. Go to Services > VPN > Enable OpenvPN Client
4. Enter in the server name you would like to setup/use. Enter in your VPN username (not your email) and your password
5. For the rest of the options/settings, copy the below
6. Open/Edit the openvpn server .ovpn file in a text editor (Notepad++, wordpad, gedit, textwrangler etc)
7. Addition Config: Enter/Type in tls-crypt ta.key 1
Copy the contents from the openvpn server profile file, starting from <tls-crypt> to </tls-crypt> (should look like below)

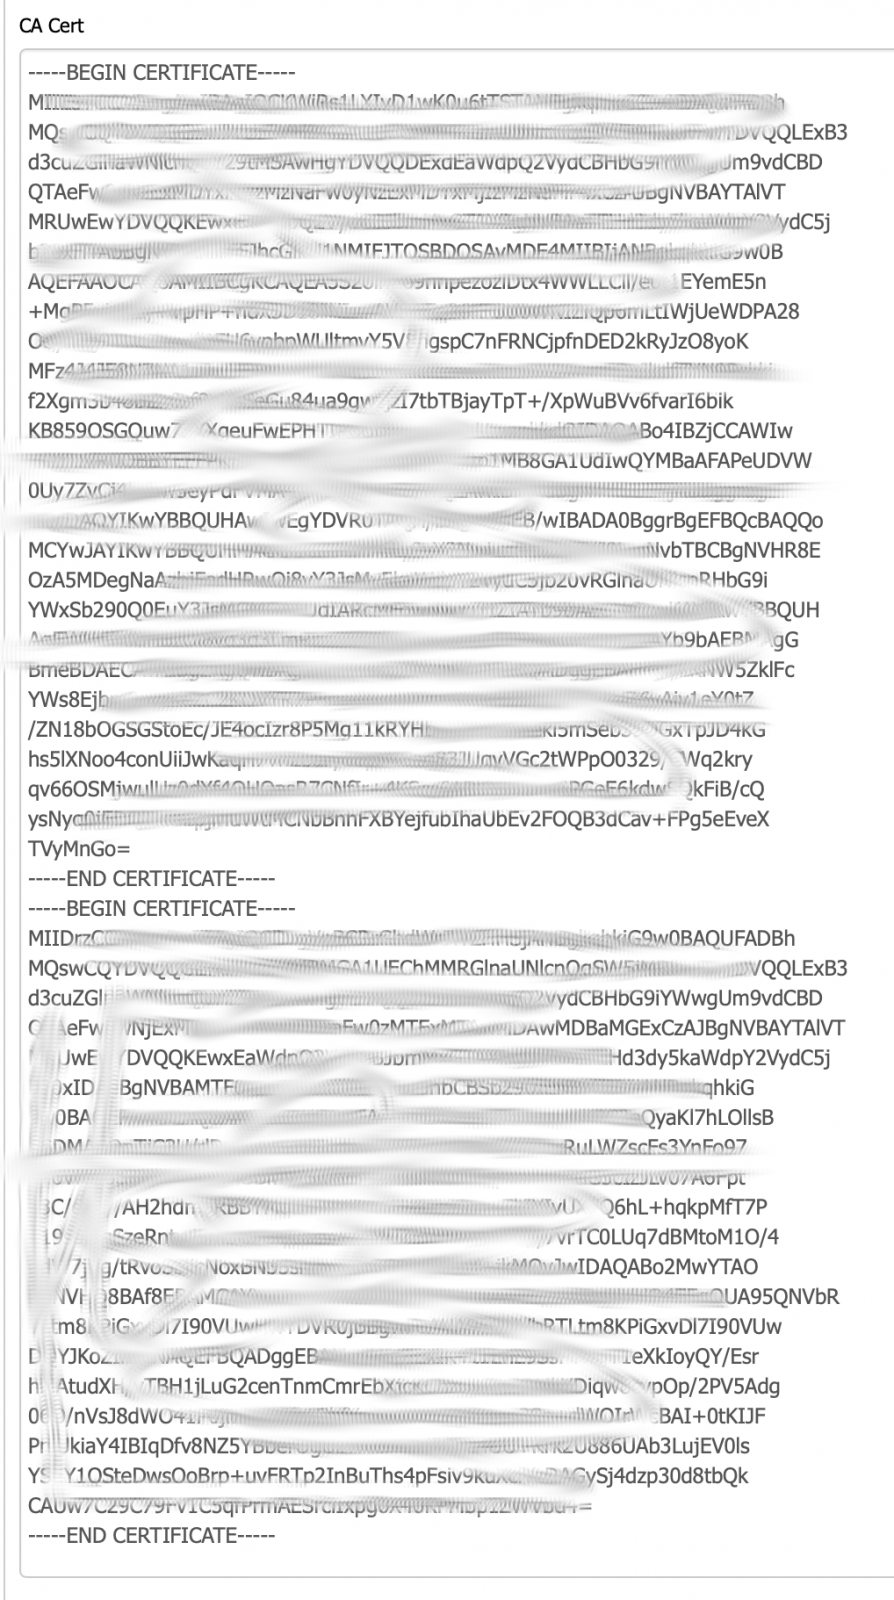
8. CA Cert: From the server profile file, copy all the lines between <ca> and </ca> and paste them into DDWRT CA cert text field (should look like below)
To start the VPN connection, click the Apply Settings towards the bottom of the page. You may view the status of your VPN connection by visiting the Status tab, and then the OpenVPN tab.
IPv6 may need to be enabled if you see IPv6 errors in status log

- Once you have sucessfully connected, please do a DNSLEAKTEST
- If you find you have DNS leaks, enable the below options
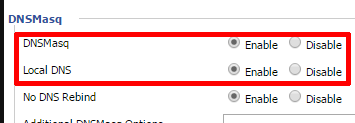
- Static DNS entries can be anything you like. We suggest to use our DNS Servers

