How to setup PFSense with Celo VPN
3. Open up the file you just downloaded in a text editor and leave it opened (notepad, gedit etc)
4. Login to your pfSense Web-UI and navigate to main menu, then System > Certificate Manager > CAs Tab > Click on the +
5. Give it a Descriptive name. A name that you can identify from the rest of other Certificate Authority inside your pfSense box. For example CELO-DE1-CA.
6. Under Method select Import from Existing Cert Auth. Under Certificate date text field, Go to your .OVPN file and copy everything that sits between
<ca> and </ca> tag and paste it to the text field (like below) then click on Save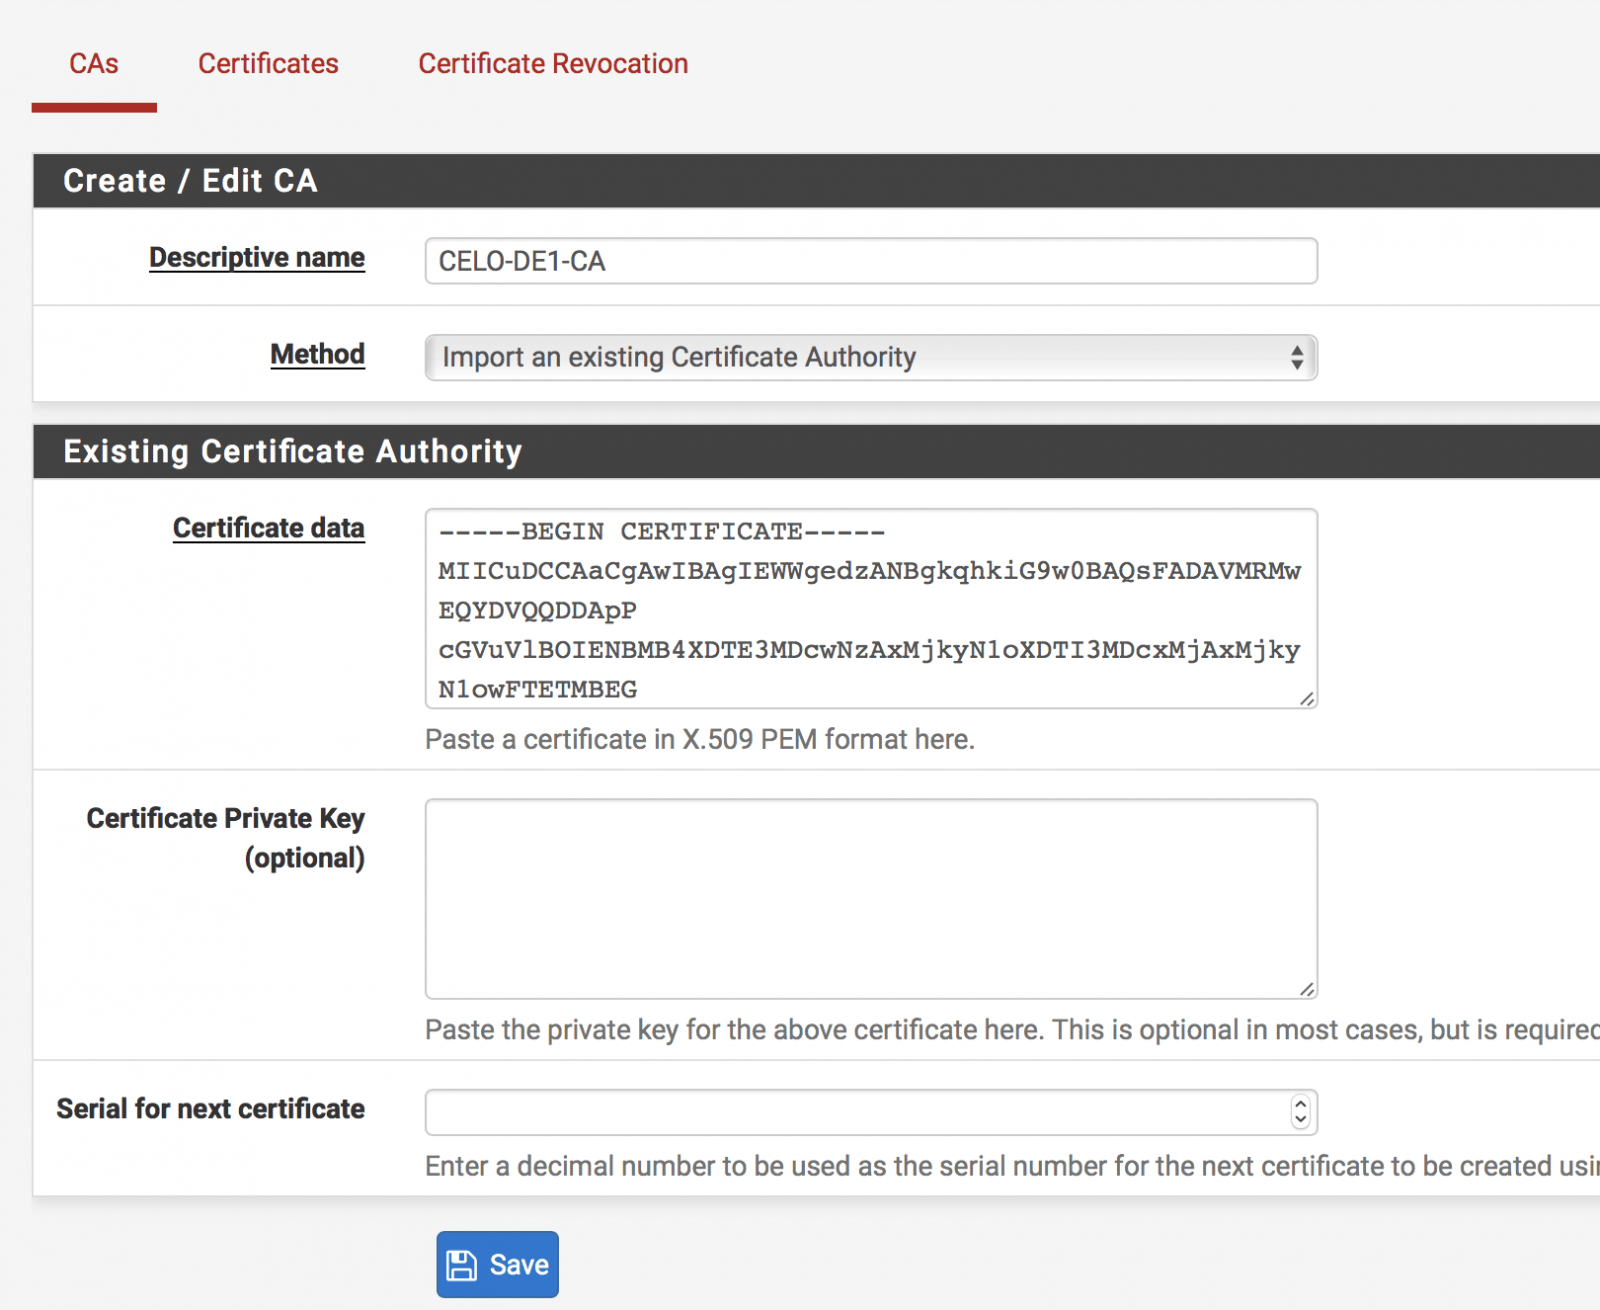
7. Click on VPN menu > OpenVPN > Clients > +
8. Copy the below settings. Enter in the server name you are setting up, and give it a description
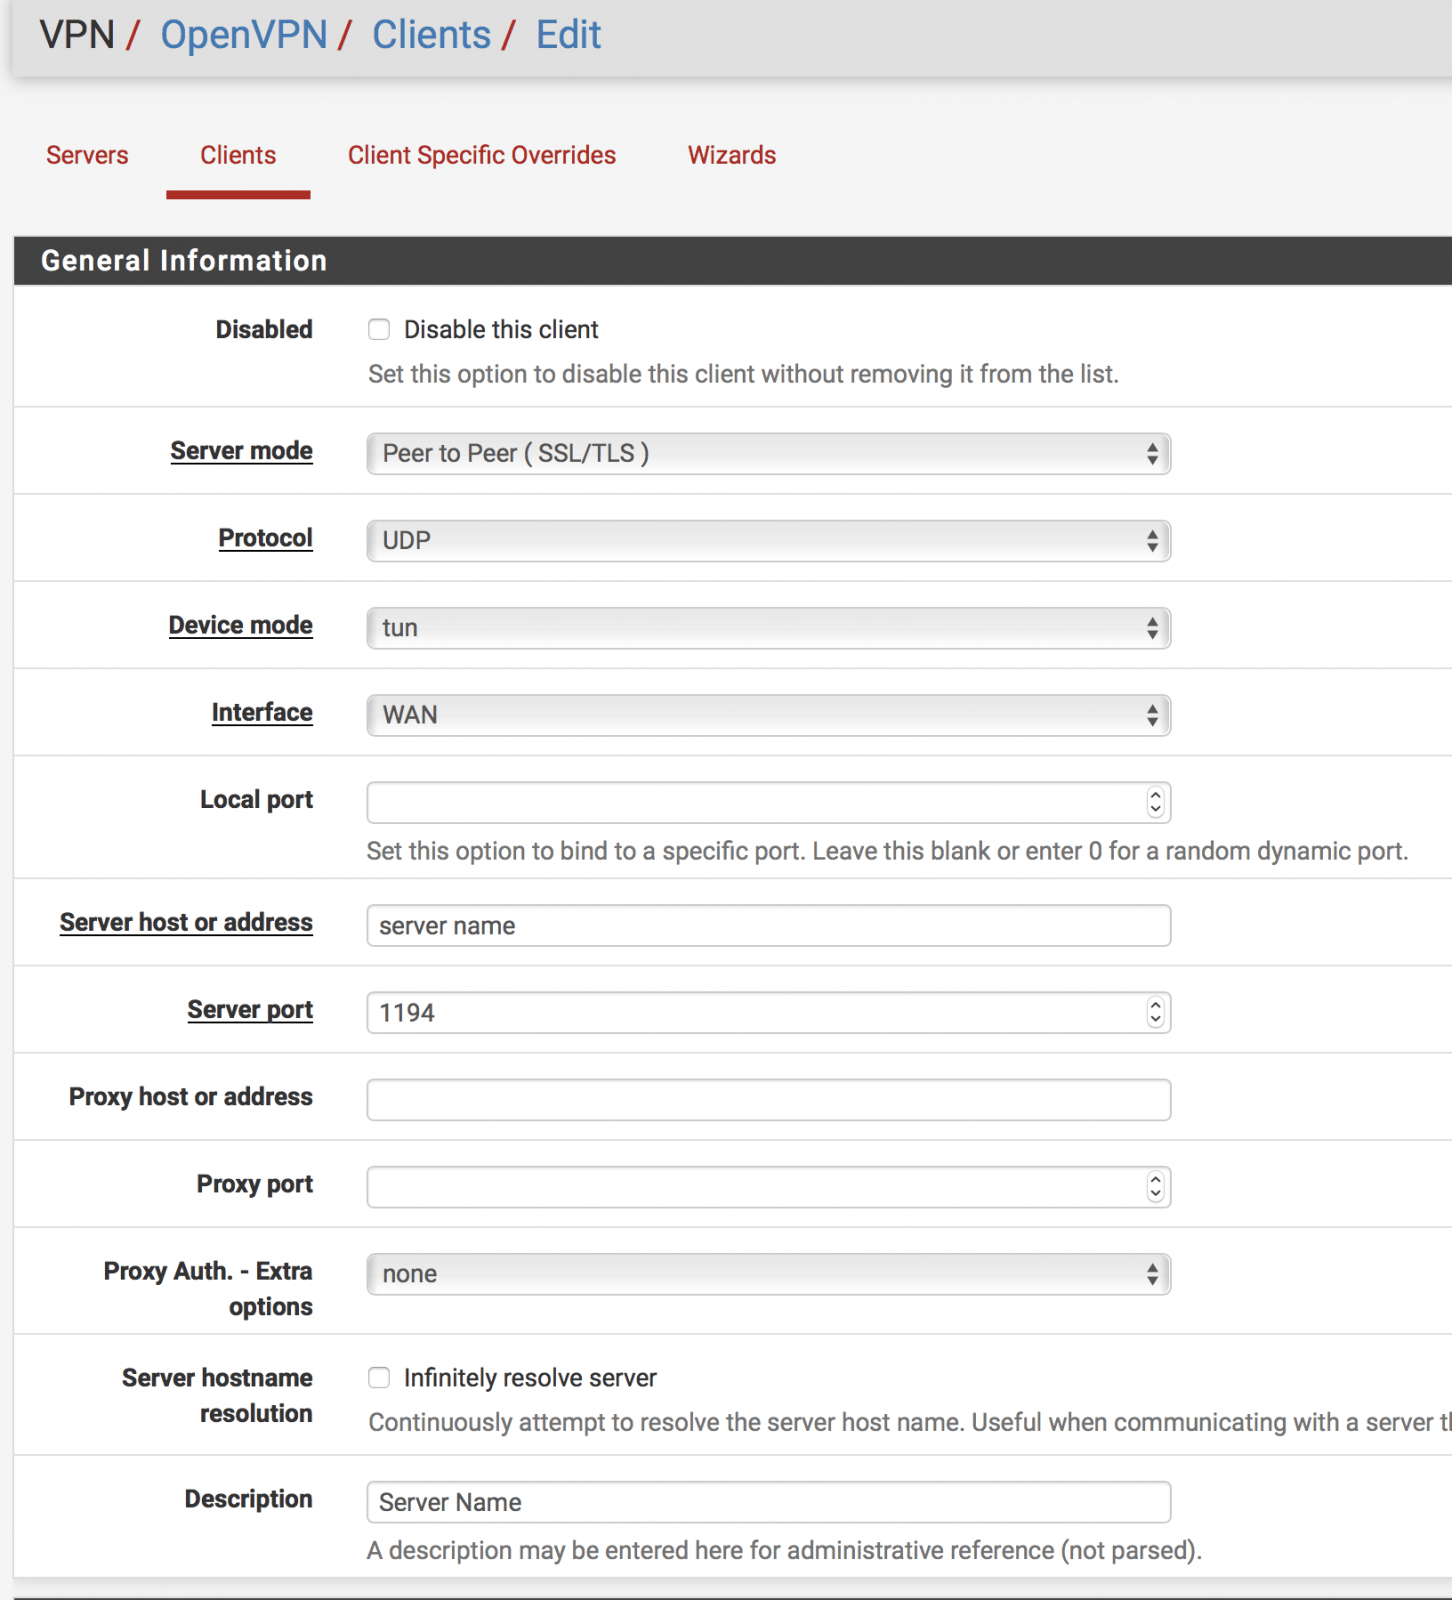
9. Under TLS authentication, Untick Automatically generate a shared TLS Authentication Key. This should give you a new text box. Go back to your .OVPN file and copy the text between
<tls-crypt> and </tls-crpyt>.
Peer Certificate Authority =Select the CA you create aboveClient Certificate = None (username and/or password required)
Copy rest of the settings from below
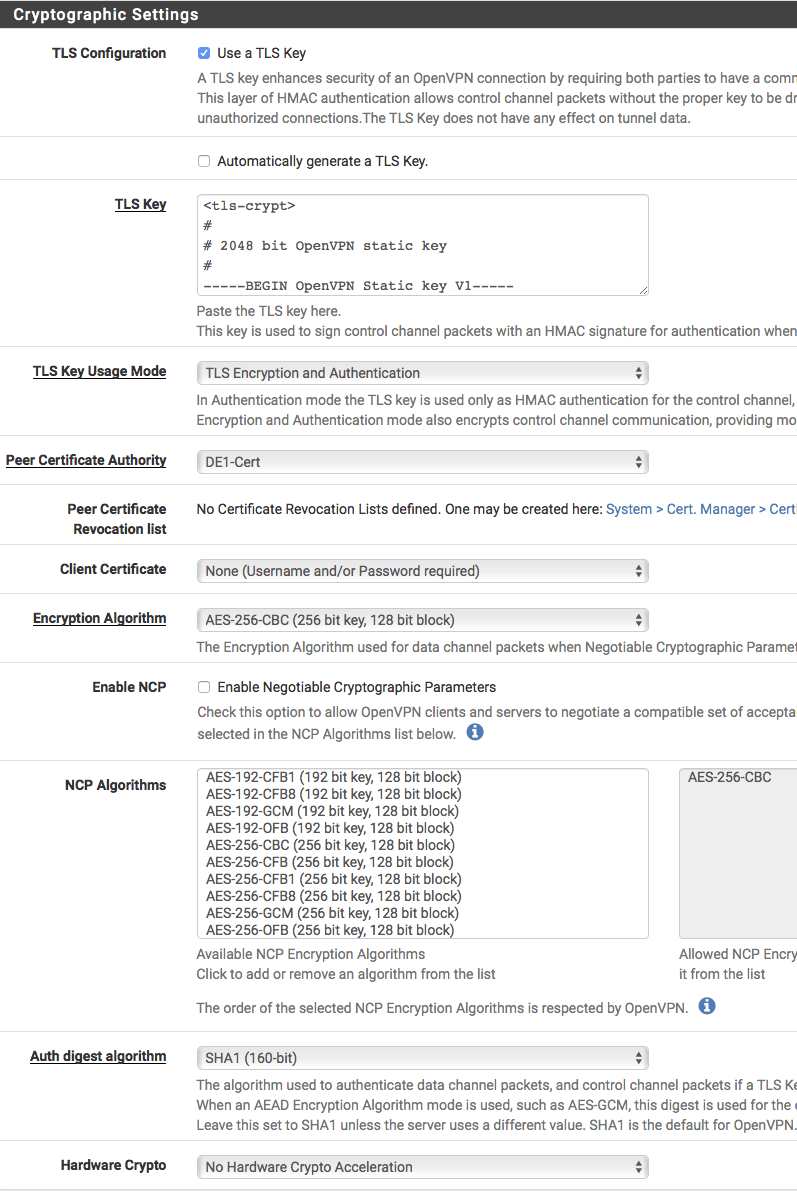
10. IPv4 Tunnel Network and IPv4 Remote Network(s) can be set to whatever you choose too. If you are unsure, copy the below
Compression = Enabled or Enabled with Adaptive Compression
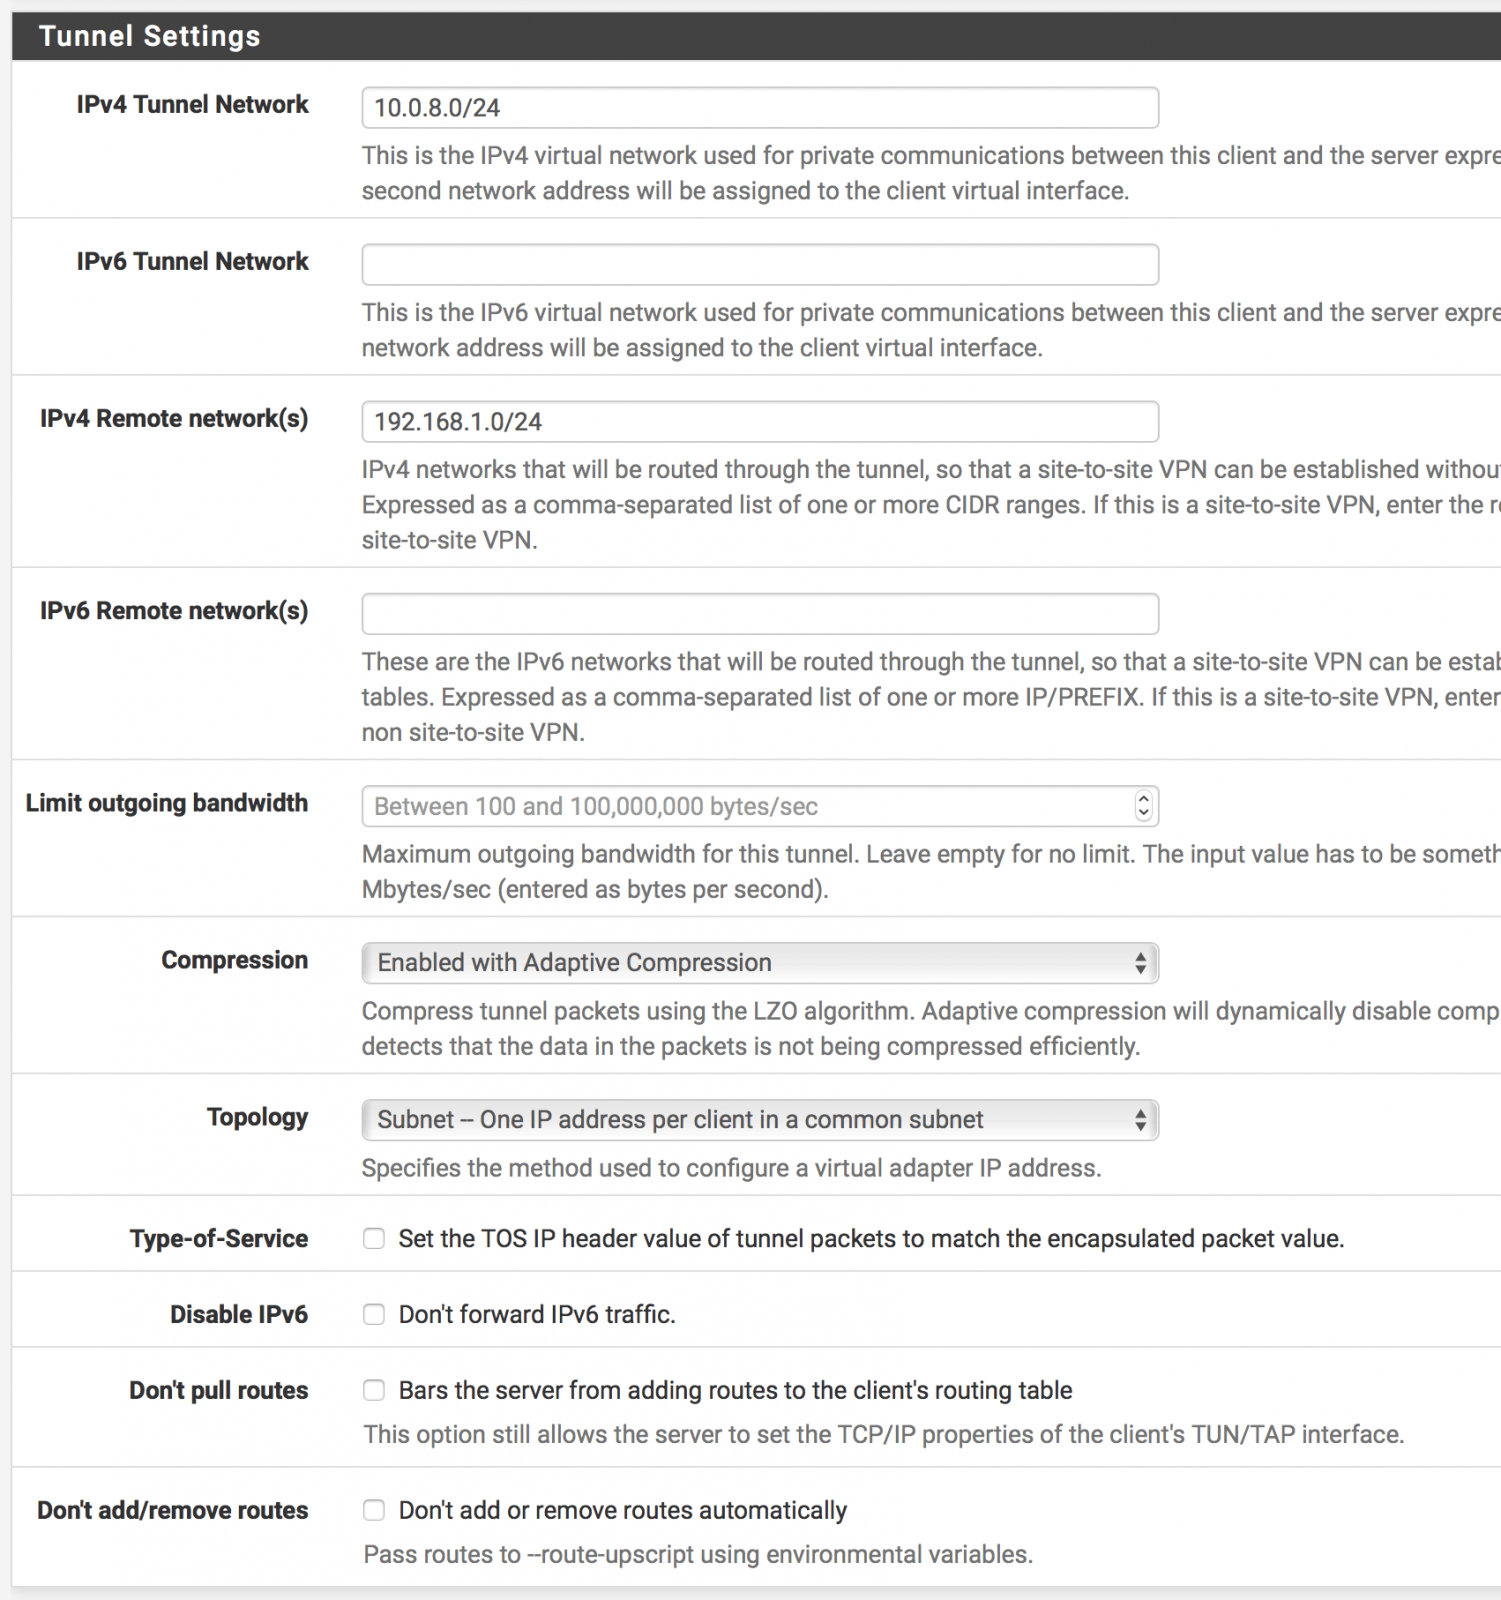
Compression = Enabled or Enabled with Adaptive Compression

11. Go to Status > OpenVPN. You should see that the openvpn service is up and running with a virtual address assigned etc.
12. Go to Interfaces > Assign. You should see a new available network port. Click Add

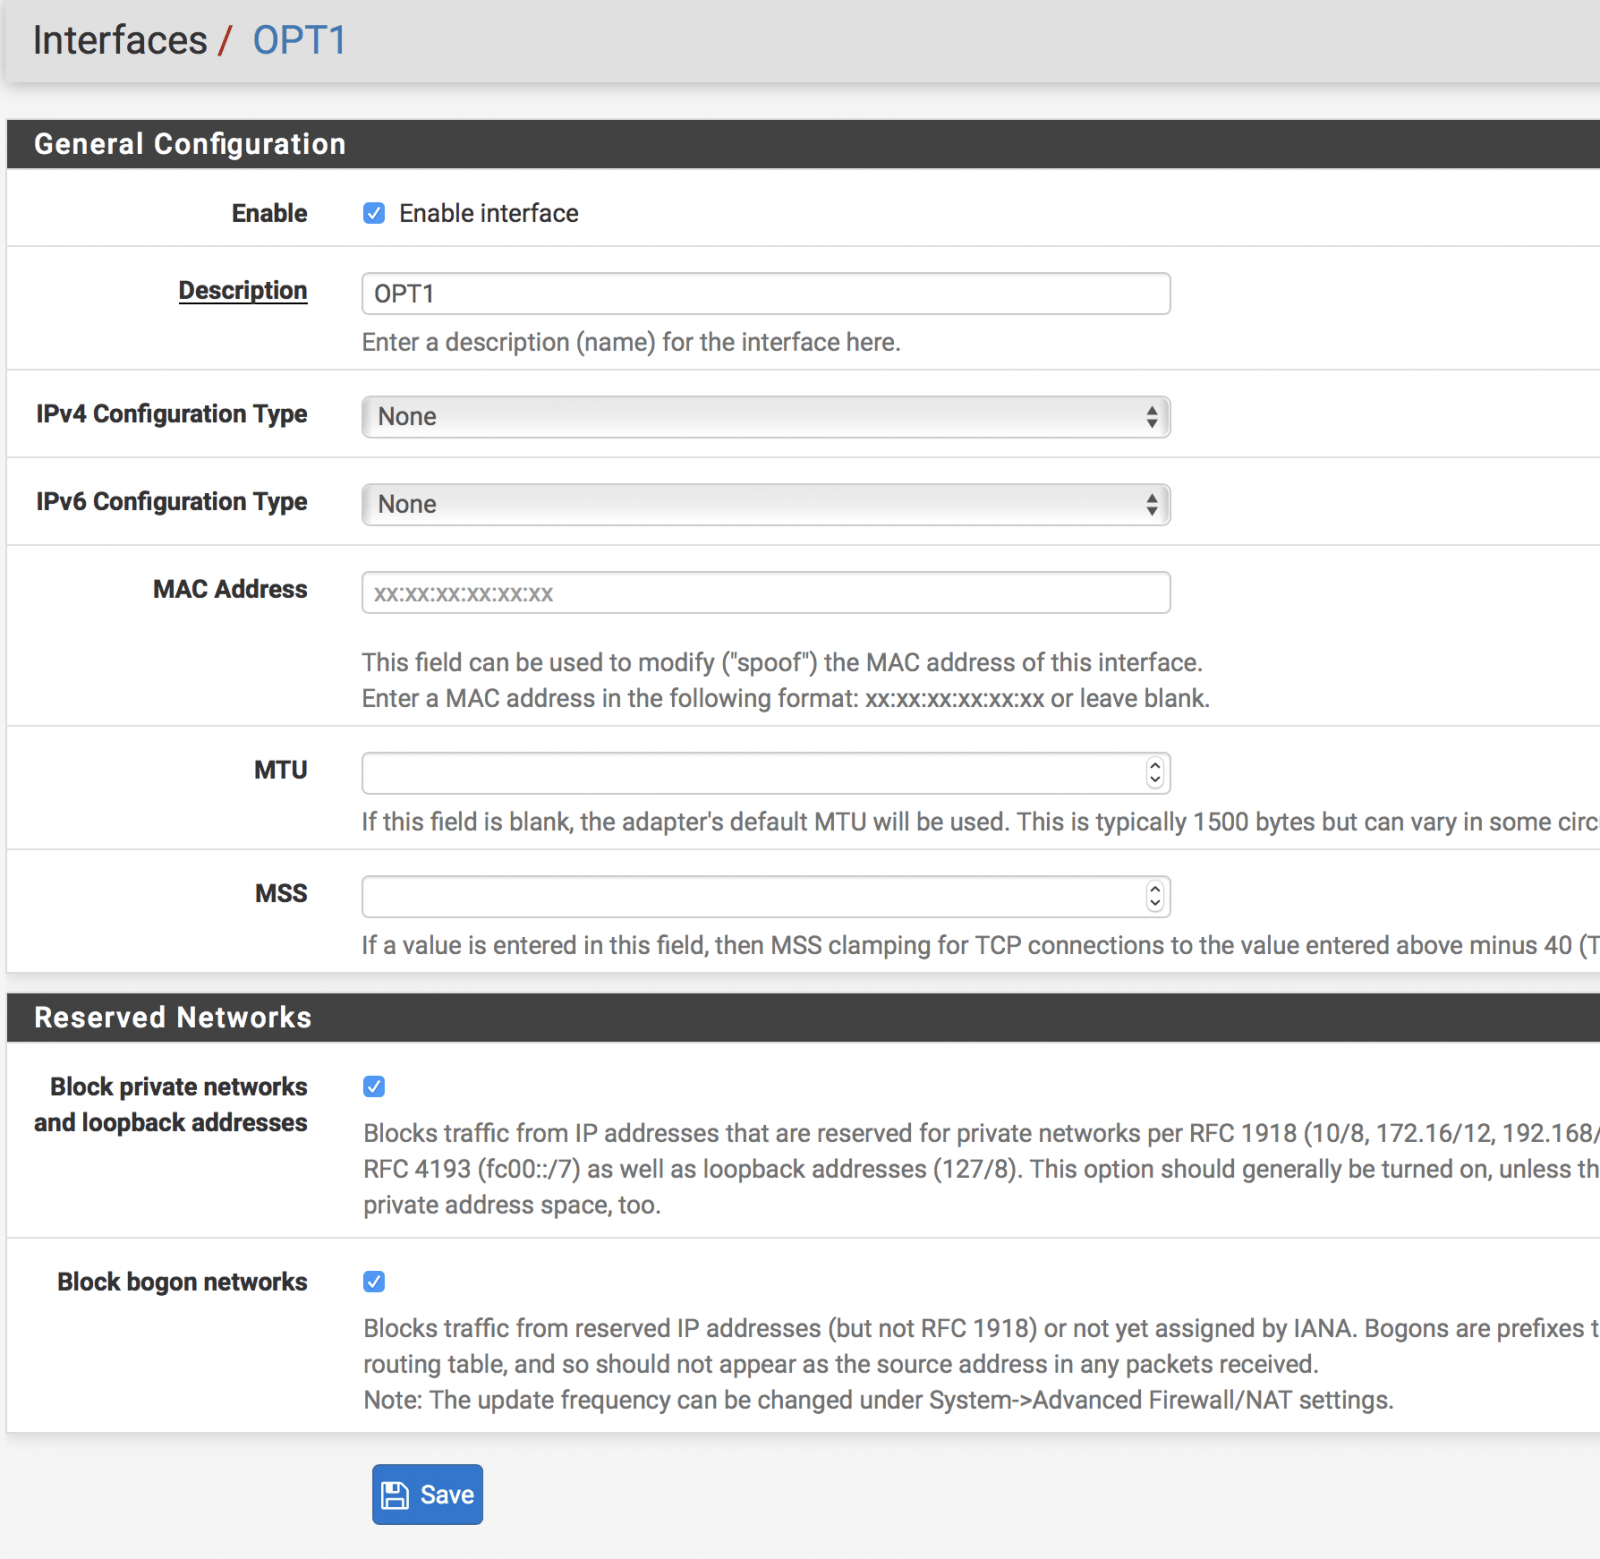
13. Click on the new Interface name (OPT1) > Copy the below settings.
14. Click Save > Apply Settings
15. Click on Firewall > NAT > Outbound > Select Manual Outbound NAT > Save > Apply Settings
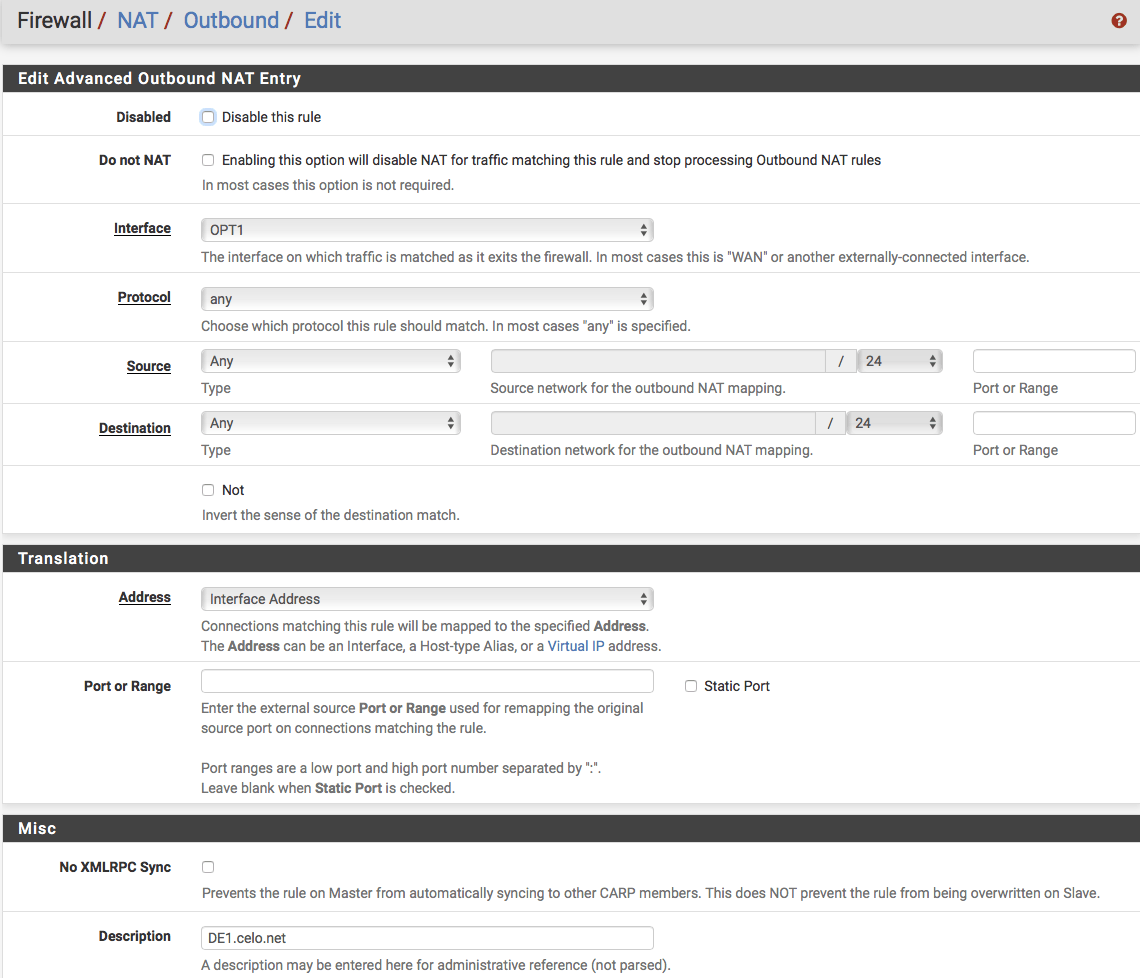
16. One the Firewall / NAT / Outbound page > Click on Add
17. Copy the below settings > Save > Apply Settings
18. Reboot PFSense via Diagnostics > Reboot
Once rebooted, log back into PFSense and check the status of OpenVPN. If connected, check the connection on a device that is connected to the same network as PFSense.
12. Go to Interfaces > Assign. You should see a new available network port. Click Add

13. Click on the new Interface name (OPT1) > Copy the below settings.
14. Click Save > Apply Settings

15. Click on Firewall > NAT > Outbound > Select Manual Outbound NAT > Save > Apply Settings
16. One the Firewall / NAT / Outbound page > Click on Add
17. Copy the below settings > Save > Apply Settings

18. Reboot PFSense via Diagnostics > Reboot
Once rebooted, log back into PFSense and check the status of OpenVPN. If connected, check the connection on a device that is connected to the same network as PFSense.

